How To
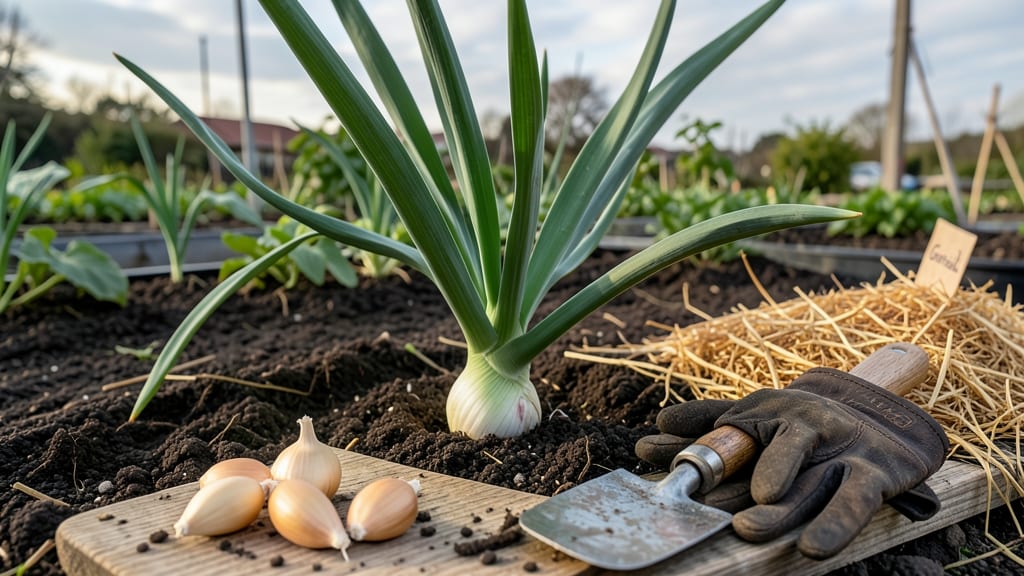
Planting garlic in the fall might seem like a simple task, but timing it right is the key to avoiding a harvest of sad, shriveled cloves.
Whether you're in zone 6a or another region, getting those 🧄 bulbs in the ground just before winter sets in makes all the difference between a thriving crop and wasted effort.
Here's the secret: you need to plant 4-6 weeks before the first frost hits. This gives your garlic enough time to establish roots before the ground freezes, setting the stage for a robust spring and summer growth.
Too early, and your garlic might bolt before winter; too late, and it won't survive the cold.
I'll walk you through the exact steps to prepare your soil, choose the right garlic variety, and plant it at the perfect depth. Plus, I'll share regional adjustments so you can adapt this method to your climate zone.
By the time next summer rolls around, you'll be harvesting plump, flavorful bulbs that put store-bought to shame.
Ready to transform your garden into a garlic powerhouse? Let's dive into the easiest way to plant garlic this fall and ensure a bumper crop next season. You won't believe how simple it can be once you know the tricks.
Optimal fall planting windows by USDA climate zones
Timing your garlic planting is everything—get it wrong, and you’ll either end up with bolted scapes or rotten cloves. The golden rule? Plant 4–6 weeks before the ground freezes, when soil temps hover around 40–50°F (4–10°C).
This window ensures roots establish before winter dormancy. But since frost dates vary wildly across the U.S., I’ve broken it down by USDA zones to help you pinpoint the perfect moment.
In Zones 3–5, aim for mid-October to early November. These colder climates demand early planting to give roots time to anchor before harsh winters. For Zones 6–7, stretch your window to late October through mid-November.
Warmer Zones 8–10 can plant until December, but don’t wait too long—soil should still be workable, not soggy.
Pro tip: Check your average first frost date (use the USDA Plant Hardiness Zone Map) and count backward. If your zone’s frost arrives November 15, plant by October 15.
Adjust for early frosts by planting sooner, and for late frosts, push planting later—but never risk planting when soil temps drop below 35°F (2°C).
🌱 USDA Zone Planting Windows for Garlic
| Zone | Ideal Planting Window | Soil Temp Goal | Key Adjustment |
|---|---|---|---|
| 3–4 | Mid-September to October 15 | 40–50°F (4–10°C) | Plant early; mulch heavily |
| 5–6 | October 1–November 1 | 45–55°F (7–13°C) | Avoid planting after first frost |
| 7–8 | October 15–November 15 | 50–60°F (10–15°C) | Use row covers for late plants |
| 9–10 | November–December (early winter) | 55–65°F (13–18°C) | Plant in cooler microclimates |
💡 Need a quick fix? Use your local cooperative extension service for hyper-local frost data.
Regional quirks matter too. In Pacific Northwest zones, wet soil delays planting—wait until soil drains well after rains. Meanwhile, Southern gardeners in Zone 9 can plant into December, but choose hardneck varieties (like ‘German White’) that tolerate cooler winters.
For Zone 10+, treat garlic like a winter crop: plant in December–January for summer harvests.
Unpredictable weather? Err on the earlier side. A 6-week buffer before frost ensures roots establish, even if winter arrives early. If you’re unsure, plant a test row 2 weeks ahead of your target date—if sprouts appear, you’re golden. No sprouts? Wait another week.
Don’t overlook microclimates. A south-facing slope warms faster than a north-facing trough, so adjust planting dates accordingly. Low-lying areas may need earlier planting due to cooler temps. Use a soil thermometer ($10 at garden centers) to confirm temps before planting.
Finally, hardneck vs. softneck matters. Hardnecks (e.g., ‘Music’, ‘Chesnok Red’) thrive in colder zones (3–7) and need a cold period to form bulbs. Softnecks (e.g., ‘Silverskin’) do better in warmer zones (8–10) and can handle milder winters.
Plant the right type for your zone to avoid disappointment.
With the right timing, your garlic will overwinter like a champ, emerging in spring with vigorous growth and bold flavor. Next up: the step-by-step planting process to lock in that perfect harvest. 🧄
Step-by-step fall planting process for maximum garlic yield
Now that you've nailed down the perfect planting window for your zone, let's get into the hands-on process that guarantees those plump, flavorful garlic bulbs. The key is in the details—soil prep, bulb selection, spacing, and depth all play critical roles in your harvest's success.
I've planted garlic for years, and these steps have become my non-negotiable routine.
First, you'll want to prepare your soil like it's hosting royalty. Garlic thrives in well-draining soil with a pH between 6.0-7.0. If your soil is heavy clay or sandy, amend it with 2-3 inches of compost or well-rotted manure mixed into the top 6-8 inches.
This improves both drainage and nutrient availability. A quick soil test can save you from guesswork—many garden centers offer affordable test kits.
Visual Element: Step-by-Step Planting Process
Choose Your Garlic
Select hardneck (cold-hardy) or softneck varieties. For fall planting, hardnecks like 'Music' or 'German White' excel in zones 3-7.
Break Bulbs Apart
Separate bulbs into individual cloves, keeping the papery skin intact. Discard any damaged or soft cloves—they won’t thrive.
Plant Pointy-End Up
Place cloves in the soil with the pointed end facing up, about 2 inches deep. This ensures proper root development.
Space Cloves Properly
Space cloves 4-6 inches apart in rows 8-12 inches apart. Tighter spacing leads to smaller bulbs.
Mulch Heavily
Apply 4-6 inches of mulch (straw or leaves) to insulate cloves and prevent frost heave.
Once your cloves are in the ground, water them thoroughly to settle the soil around them. After that, you can relax—garlic is remarkably low-maintenance once planted. However, avoid watering again until spring, as too much moisture in winter can cause rot.
In late winter or early spring, when you see green shoots poking through the mulch, it's time to remove half the mulch to allow sunlight to reach the leaves.
Pro tip: If you're in a warmer zone (8-10), where winters are mild, plant garlic in December or January to avoid summer bolting. The goal is always to give your garlic 6-8 weeks of cold (below 40°F) to trigger bulb formation.
Even in warm climates, you can simulate this by chilling bulbs in the fridge for 6 weeks before planting.
By following these steps, you'll set your garlic up for a healthy, robust growth cycle. Next summer, you'll be harvesting bulbs that are 3-4 times larger than store-bought varieties—all thanks to perfect fall planting. The best part? Once you master this process, garlic practically plants itself year after year.